Downtime Is a Feature: Custom Domains, Cloudflare, and MCP While Models Download
You know how it goes in AI development — sometimes you're stuck watching progress bars crawl forward. I've been preparing for the next installment of the Local Model Showdown series, and that means downloading some hefty models. Kimi K2.6 decided to take its sweet time. We're talking hours.
But here's the thing: downtime is really just opportunity in disguise. Instead of watching percentages tick up, I knocked out three items from the backlog that had been bugging me for a week. All done conversationally through Coder Agents, naturally.
The hit list:
- Put my self-hosted Coder instance behind a real domain
- Harden the Cloudflare setup (and discover a gotcha that every content creator needs to know)
- Wire up MCP servers to give my agents superpowers
The Goal: coder.vibescoder.dev
My Coder instance was running on my homelab Ubuntu workstation, accessible through a try.coder.app tunnel URL — functional but ugly, hard to remember, and not exactly on-brand. I bought vibescoder.dev for the blog. Time to use coder.vibescoder.dev for the dev environment.
Sounds simple. It wasn't.
Attempt 1: CNAME Records (The Naive Approach)
First move was straightforward — add CNAME records in Vercel's DNS management (since I bought the domain through Vercel) pointing the coder subdomain to the existing tunnel URL.
Gotcha #1: Vercel's DNS form defaults to record type "A" (which expects an IPv4 address). Spent a minute confused by the "value should match format ipv4" error before realizing I needed to switch the Type dropdown to "CNAME." Small thing, but it'll trip you up if you're not looking at the form defaults.
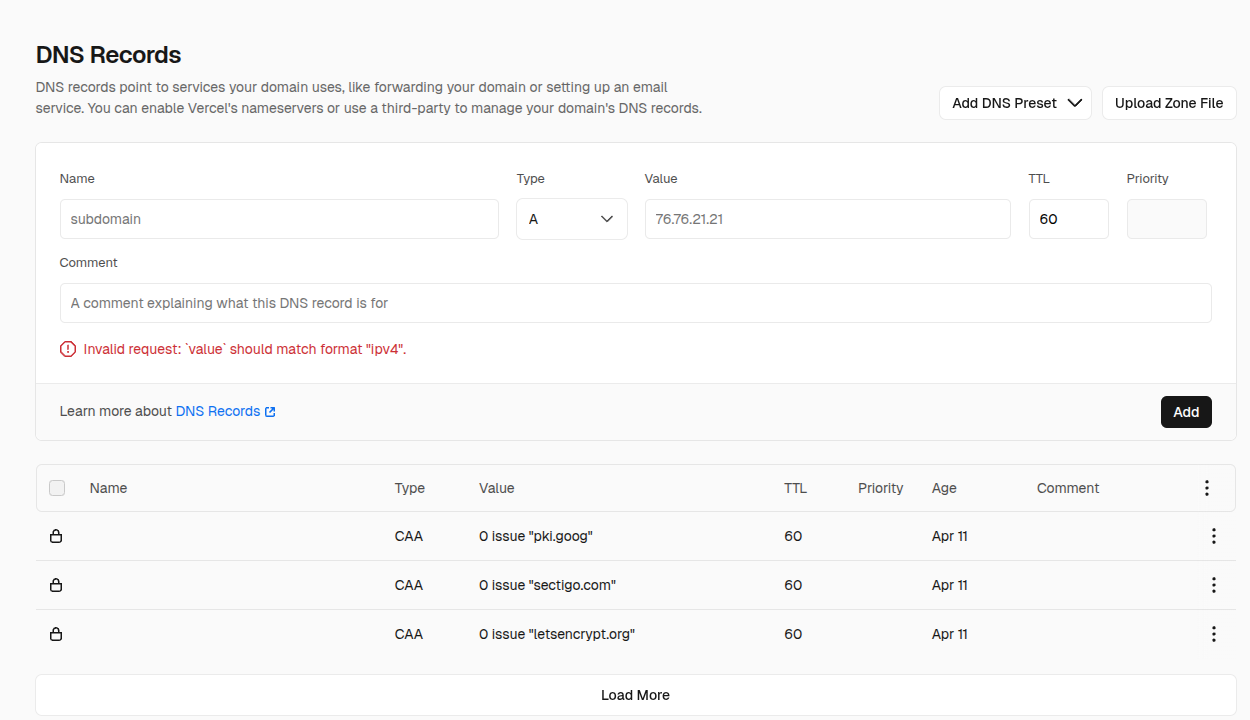
Vercel's DNS form defaults to an A record — switch the type to CNAME or you'll get this unhelpful error.
Then I went to update the Access URL in Coder's dashboard. Deployment → General → Access URL. It's right there on the screen... and it's read-only. The UI shows you the value but can't change it. The badges underneath tell the story: CLI --access-url, ENV CODER_ACCESS_URL, YAML accessURL. Server config only.
Since Coder runs via systemd on my homelab, the config lives at /etc/coder.d/coder.env. But before I could update it, I needed to solve the bigger problem: getting traffic from the internet to my machine.
Attempt 2: Port Forwarding (The Frustrating Detour)
For a CNAME-based approach to work, my homelab needs to be reachable from the internet on ports 80 and 443. That means port forwarding on the router — a TP-Link Archer BE800.
The router app doesn't expose port forwarding. The Tether iPhone app has a "More" menu with various settings, but NAT Forwarding isn't there. Had to use the web interface at 192.168.0.1 instead. Found it under Advanced → NAT Forwarding → Port Forwarding.
Set up the rules: ports 80 and 443, TCP, forwarded to my machine's internal IP (192.0.2.243). Then tested with a simple Python HTTP server:
sudo python3 -c "from http.server import HTTPServer, SimpleHTTPRequestHandler; HTTPServer(('0.0.0.0', 443), SimpleHTTPRequestHandler).handle_request()"Local curl worked. External requests to my public IP? "Connection refused." Not a timeout — refused. Tried non-standard ports too. Same result.
The diagnosis: "Connection refused" from outside while "works locally" means traffic is reaching the public IP but getting actively rejected before it hits the machine. The ISP is likely blocking inbound connections or there's a NAT layer beyond the router. A timeout would mean packets are being dropped. Refused means something is saying "no."
I spent more time on this than I'd like to admit. Time for Plan B.
The Solution: Cloudflare Tunnel
Cloudflare Tunnel flips the model entirely. Instead of opening inbound ports, it creates an outbound connection from your machine to Cloudflare's edge. No port forwarding. No router config. No public IP exposure. And it's free.
Step 1: Move Nameservers
Since I needed Cloudflare to manage DNS for vibescoder.dev, I:
- Created a free Cloudflare account
- Added
vibescoder.devas a site - Let it auto-import my existing DNS records (Vercel A records, CAA records, everything)
- Selected the Free plan
- Updated nameservers at Vercel (the registrar) to point to Cloudflare's nameservers
The blog continues to work — Cloudflare imported all existing records, so vibescoder.dev still routes to Vercel's servers.
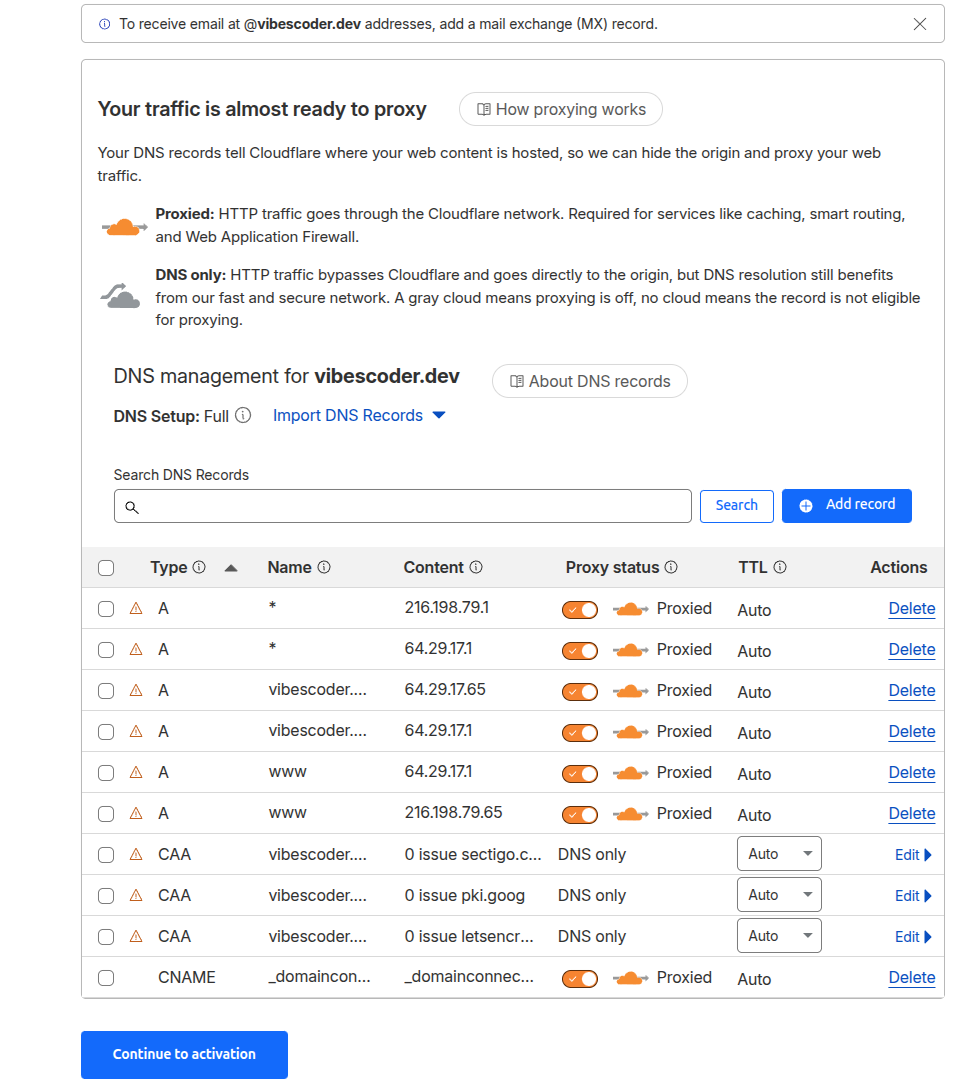
Cloudflare auto-imports your existing DNS records — the blog keeps working while you set up the tunnel.
Step 2: Create the Tunnel
On the homelab machine:
curl -L --output cloudflared.deb https://github.com/cloudflare/cloudflared/releases/latest/download/cloudflared-linux-amd64.deb
sudo dpkg -i cloudflared.deb
cloudflared tunnel login
cloudflared tunnel create coder-tunnel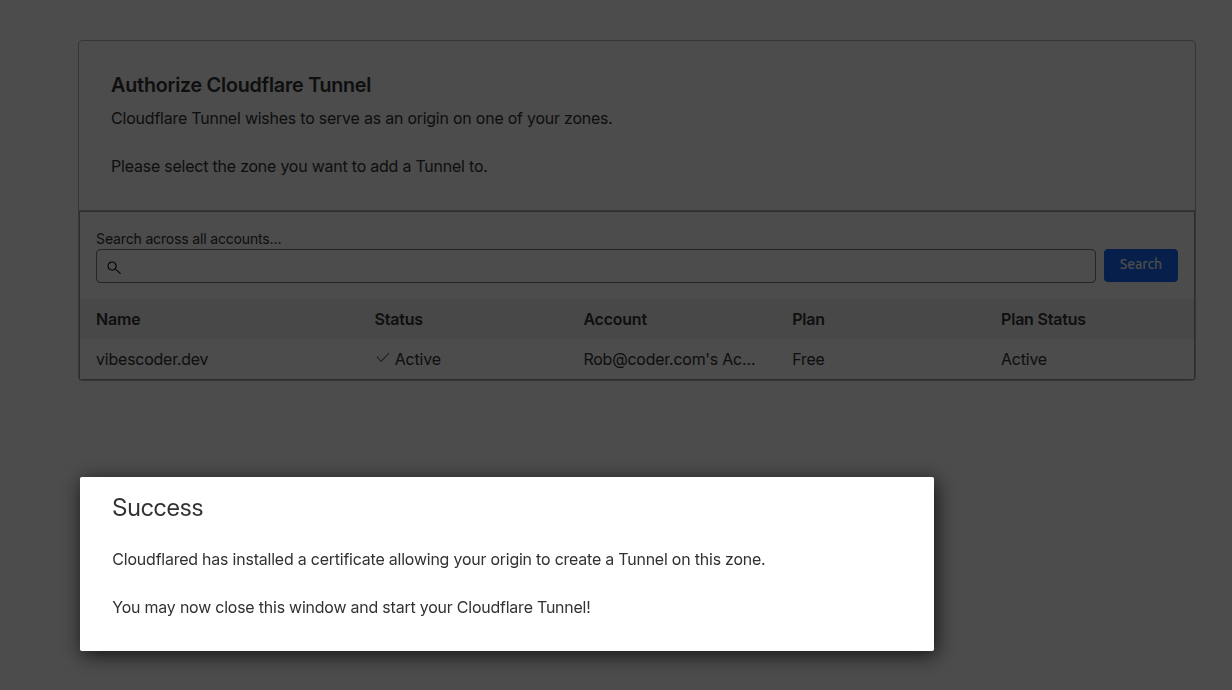
After cloudflared tunnel login, the browser confirms the certificate is installed and you're authorized.
Config file at ~/.cloudflared/config.yml:
tunnel: a1b2c3d4-e5f6-7890-abcd-ef1234567890
credentials-file: /home/youruser/.cloudflared/a1b2c3d4-e5f6-7890-abcd-ef1234567890.json

ingress:
  - hostname: coder.vibescoder.dev
    service: http://localhost:3000
  - hostname: "*.coder.vibescoder.dev"
    service: http://localhost:3000
- service: http_status:404The wildcard entry handles Coder's app proxying — port forwarding, web terminals, and workspace apps all use subdomains like 8080--main--ws--user--coder.vibescoder.dev.
Step 3: Wire Up DNS and Coder
cloudflared tunnel route dns coder-tunnel coder.vibescoder.dev
cloudflared tunnel route dns coder-tunnel "*.coder.vibescoder.dev"Updated /etc/coder.d/coder.env:
CODER_ACCESS_URL=https://coder.vibescoder.dev
CODER_WILDCARD_ACCESS_URL=*.coder.vibescoder.dev
Restarted Coder, ran the tunnel — four connections registered to Cloudflare's SJC edge locations. Opened https://coder.vibescoder.dev in a browser. Coder login screen. Done.
Step 4: Make It Permanent
Gotcha #2: sudo cloudflared service install couldn't find the config. It looks in /etc/cloudflared/, not ~/.cloudflared/. Had to copy both files:
sudo mkdir -p /etc/cloudflared
sudo cp ~/.cloudflared/config.yml /etc/cloudflared/config.yml
sudo cp ~/.cloudflared/*.json /etc/cloudflared/Updated the credentials-file path in the copied config to point to /etc/cloudflared/, then:
sudo cloudflared service install
sudo systemctl enable cloudflared
sudo systemctl start cloudflaredTwo systemd services now: coder and cloudflared. Both start on boot. The architecture:
Browser → https://coder.vibescoder.dev
       → Cloudflare Edge (TLS termination, DNS)
       → Cloudflare Tunnel (outbound from homelab)
       → localhost:3000 (Coder server)
Zero inbound ports. Zero public IP exposure. Free TLS from Cloudflare. Survives reboots.
Hardening Cloudflare (And the AI Crawler Gotcha)
With Cloudflare in front of everything, I reviewed the security settings. Here's what's worth enabling on the free tier:
| Setting | What it does |
|---|---|
| SSL/TLS → Full (strict) | Ensures encryption all the way to the origin, not just browser-to-Cloudflare |
| Bot Fight Mode | Challenges malicious bots — scrapers, credential stuffers, spam |
| DDoS Protection | Already active by default |
| Always Online | Serves cached pages if your origin goes down |
The WAF Managed Ruleset (SQL injection, XSS protection) requires a Pro plan. Skipped for now.
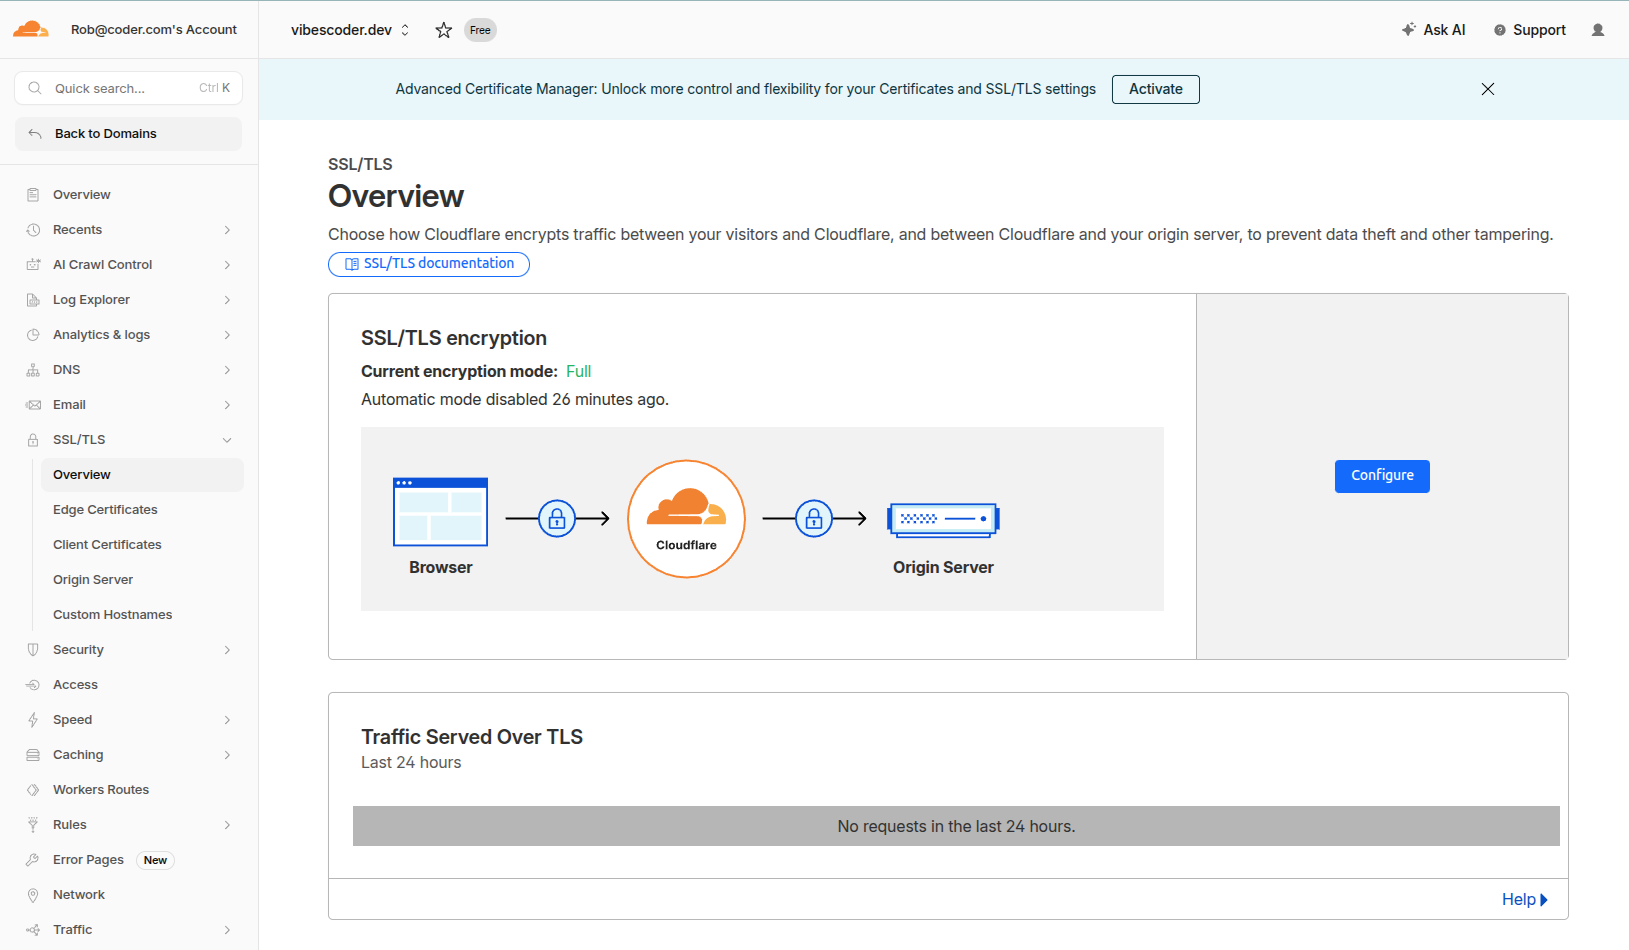
Set SSL/TLS to Full (strict) to encrypt traffic all the way from Cloudflare to your origin server.
The Part Every Content Creator Needs to Read
Cloudflare's free tier includes two AI-related settings that are on by default:
- Block AI bots — Blocks bots Cloudflare categorizes as AI training crawlers (GPTBot, CCBot, Google-Extended, etc.)
- AI Labyrinth (Beta) — Injects fake AI-generated content into your pages to poison bots that ignore crawling standards
Both sound great if you want to protect your content from being scraped. But think about what these actually do: they block the crawlers that feed ChatGPT search, Perplexity, Google AI Overviews, and every other AI-powered discovery tool.
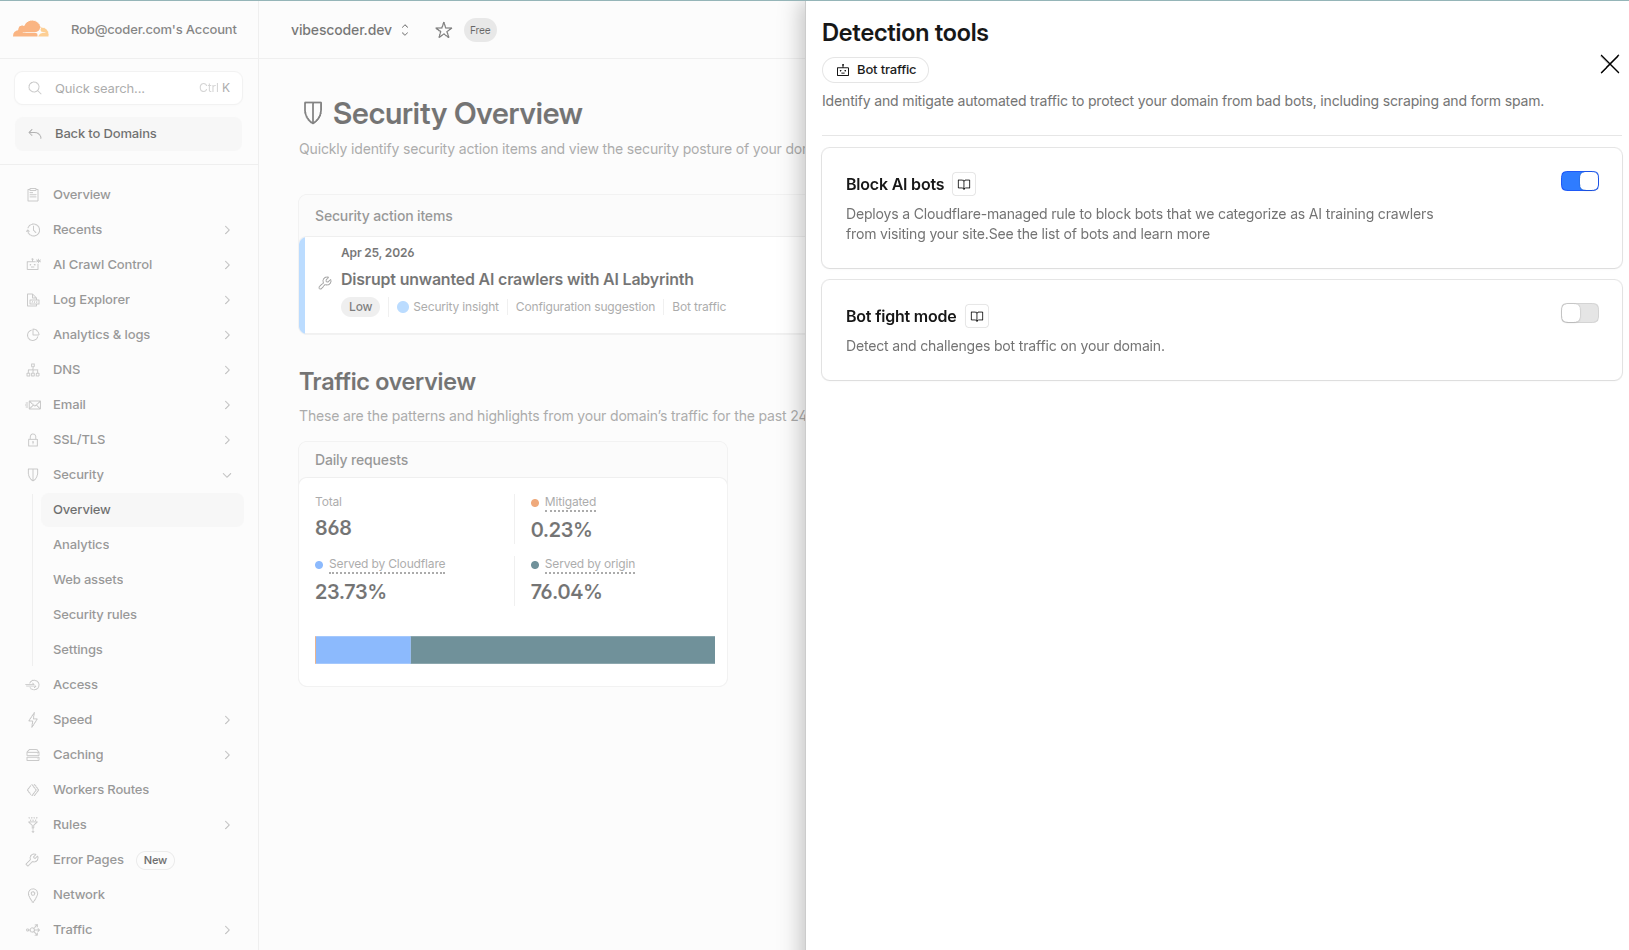
This innocent-looking toggle blocks the AI crawlers that power ChatGPT search, Perplexity, and Google AI Overviews.
If your site exists for thought leadership, you want AI services to find, index, and cite your content. That's the entire point. Blocking AI crawlers is blocking your distribution channel.
The distinction:
- Block AI bots / AI Labyrinth = blocks crawlers that feed AI search and training. Kills discoverability.
- Bot Fight Mode = blocks malicious bots. Doesn't affect legitimate AI crawlers.
I turned both Block AI bots and AI Labyrinth off, while keeping Bot Fight Mode on. If you're running a personal brand, a company blog, or anything where you care about AI-powered search visibility — check these settings immediately after onboarding to Cloudflare. The defaults optimize for content protection, not content distribution.
MCP: Giving Agents Superpowers
With the infrastructure sorted, I moved to the fun part: MCP (Model Context Protocol) integration. MCP lets AI agents access external tools — think of it as a plugin system for LLMs.
The AI Gateway
Two lines in coder.env unlock the big stuff:
CODER_EXPERIMENTS=oauth2,mcp-server-http
CODER_EXTERNAL_AUTH_0_MCP_URL=https://api.githubcopilot.com/mcp/
The first enables Coder's experimental MCP support. The second wires GitHub's MCP server into Coder's AI Gateway. Since I already had GitHub OAuth configured, this means the gateway automatically injects GitHub tools (prefixed with bmcp_) into every agent's LLM requests. Every agent in every workspace gets GitHub repo access, PR management, issue tracking — zero per-workspace config.
Choosing MCP Servers
Researched the ecosystem and selected five servers based on this specific stack:
| MCP Server | Why |
|---|---|
| GitHub (official, 29K stars) | Blog content is a private GitHub repo. Handled via AI Gateway. |
| Context7 (Upstash, 53K stars) | Feeds current library docs to LLMs instead of hallucinated APIs. Critical for Next.js 16. |
| Vercel (official) | Check deployments, read build logs, manage env vars. |
| Cloudflare (official, 3.6K stars) | DNS analytics, tunnel debugging, observability. |
| Playwright (Microsoft, 31K stars) | Visual testing of blog deployments. |
What I deliberately skipped: Ollama-specific MCP servers. This is a common misconception worth calling out. You don't need an "Ollama MCP server." Ollama is the LLM backend — agents call it for inference. MCP servers provide tools (GitHub access, deployment management, browser automation). The agent uses Ollama to think about what to do, and MCP tools to do it. They're separate concerns.
Wiring It Into the Template
MCP servers in Coder aren't configured in the admin panel — they're discovered via a .mcp.json file in the workspace root. Gotcha #3: I spent time looking for an MCP settings page in the Coder dashboard before discovering this.
To make it persistent across all workspaces, I edited the Docker template's main.tf:
coder templates pull docker .
nano main.tf  # add .mcp.json to startup_script
coder templates push docker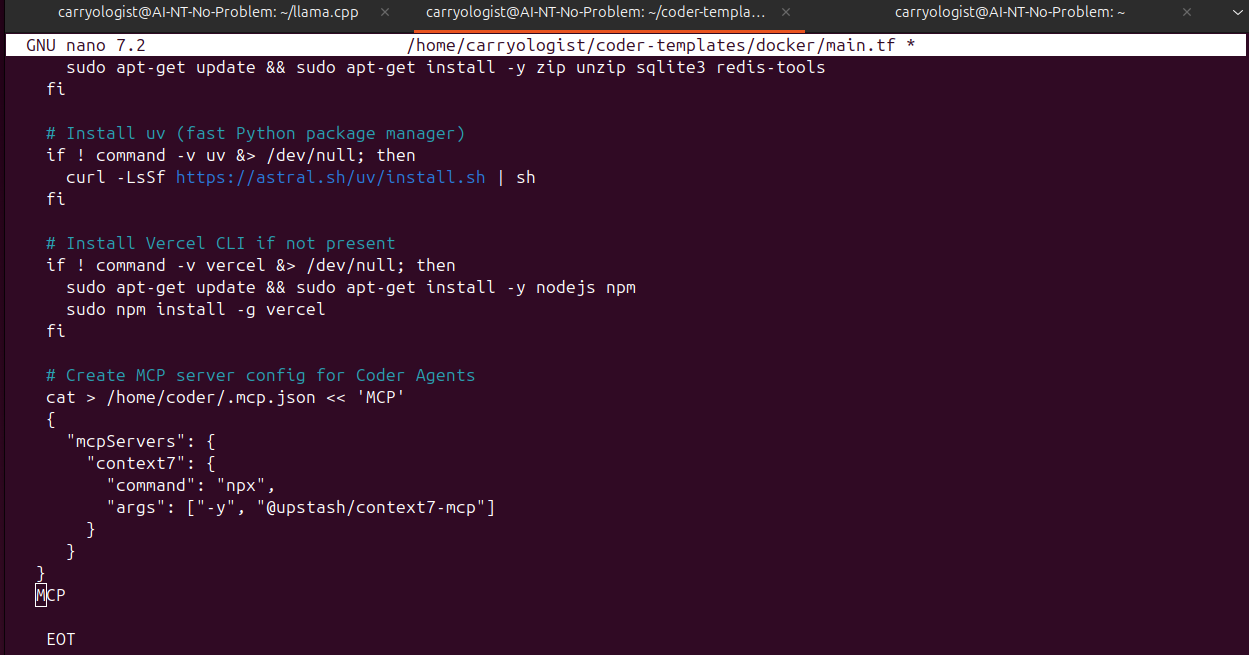
Editing the Docker template's main.tf to inject .mcp.json into every workspace at startup.
The startup script now writes this .mcp.json to every workspace:
{
  "mcpServers": {
    "context7": {
      "command": "npx",
      "args": ["-y", "@upstash/context7-mcp"]
    },
    "vercel": {
      "command": "npx",
      "args": ["mcp-remote", "https://mcp.vercel.com"]
    },
    "cloudflare": {
      "command": "npx",
      "args": ["mcp-remote", "https://agents.cloudflare.com/mcp"]
    },
    "playwright": {
      "command": "npx",
      "args": ["-y", "@playwright/mcp@latest"]
    }
  }
}Context7 and Playwright run locally as stdio processes. Vercel and Cloudflare connect to remote HTTP endpoints and handle OAuth on first use.
The Full Stack
┌─────────────────────────────────────────────────────┐
│              HOMELAB (Ubuntu + RTX 5090)             │
│                                                     │
│  Ollama (local LLMs) ◄── Coder AI Gateway           │
│                           │                         │
│  Coder Server ────────────┤  Injected tools:        │
│  (systemd, port 3000)     │  • bmcp_github_*        │
│                           │                         │
│  Cloudflared ─────────────┤                         │
│  (systemd, tunnel)        │                         │
│                           │                         │
│  Workspace (.mcp.json):   │                         │
│  • context7 (stdio)       │                         │
│  • playwright (stdio)     │                         │
│  • vercel (remote HTTP)   │                         │
│  • cloudflare (remote HTTP)                         │
└───────────────┬─────────────────────────────────────┘
                │ Cloudflare Tunnel
                ▼
┌─────────────────────────────────────────────────────┐
│              EXTERNAL SERVICES                      │
│                                                     │
│  Cloudflare Edge (DNS, TLS, DDoS, Bot Fight Mode)   │
│  GitHub (content repo, MCP via AI Gateway)           │
│  Vercel (blog hosting, MCP remote server)            │
│  Anthropic Claude (blog post generation)             │
│  Upstash Redis (analytics)                           │
└─────────────────────────────────────────────────────┘
By the Numbers
- 2 port forwarding rules attempted (failed — ISP blocking)
- 1 Cloudflare Tunnel created (0 inbound ports required)
- 4 environment variables changed in
coder.env - 2 systemd services running (coder + cloudflared)
- 5 Cloudflare security settings reviewed
- 2 AI-blocking features disabled for thought leadership discoverability
- 5 MCP servers configured (GitHub via AI Gateway + 4 in .mcp.json)
- 1 workspace template updated
- 3 gotchas discovered (Cloudflare AI defaults,
.mcp.jsondiscovery,cloudflaredconfig paths) - ~2 hours of productive "downtime" while models downloaded